Adding, Deleting or Editing Users
Note: These functions are only available to your organisation's Salpulse Administrator(s) and Restricted Administrator(s).
Adding Users
To add an employee to Salpluse, click on the Admin menu item, click on the Users tab, then click on the Settings radio button. This will show a list of users:
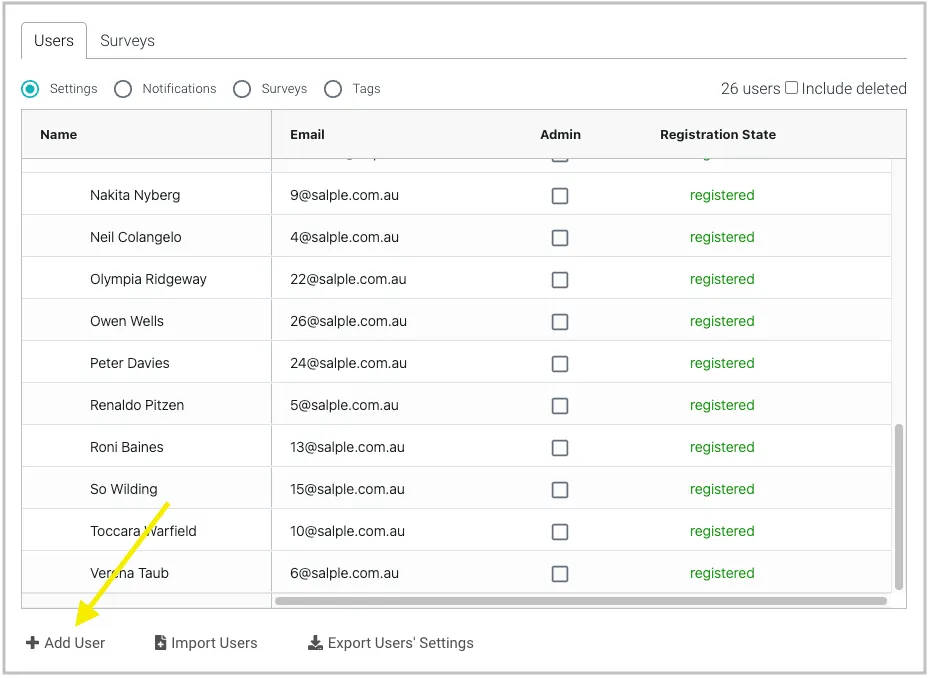
Click on the Add User button, enter the user's first name, last name and email address, then click Add User in the dialog. This then display the following dialog:
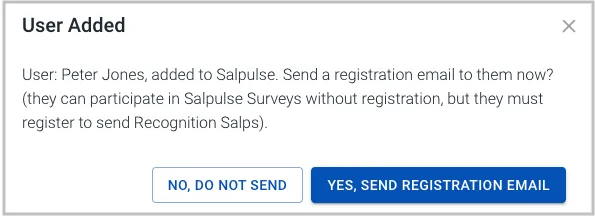
If your organisation is using Salpulse just for culture surveys, then you would typically click No, do not send. Users do not need to register (ie: set up a login/password) in order to participate in the culture surveys. If however, your organisation is using the recognition platform features of Salpulse, click Yes, send registration email.
You may have users who do not have work email addresses who you want to add to the system so they can participate in surveys. For example, some factories do not provide email facilities to some shop floor personal. In this case, set them up with kiosk mode access, so they can still complete the Salpulse Culture Survey.
Sending Registration Emails
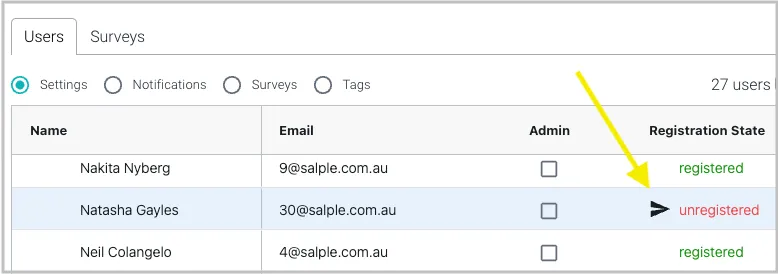
If you chose not to send the registration email when adding a user, you can do this at a later time. From the Users tab of the Admin menu item, click the Settings radio button, then hover over the unregistered label in the Registration State column for the user. Then click on the plane icon:
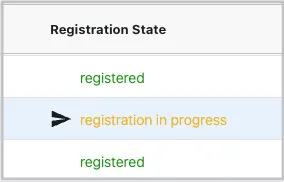
If you have sent the registation email, but the user has not yet responed, the Registration State will display registration in progress. You can resend the registration email by clicking the plane icon:
Deleting Users
To delete an employee from Salpluse, click on the Admin menu item, click on the Users tab, then click on the Settings radio button. This will show a list of users:
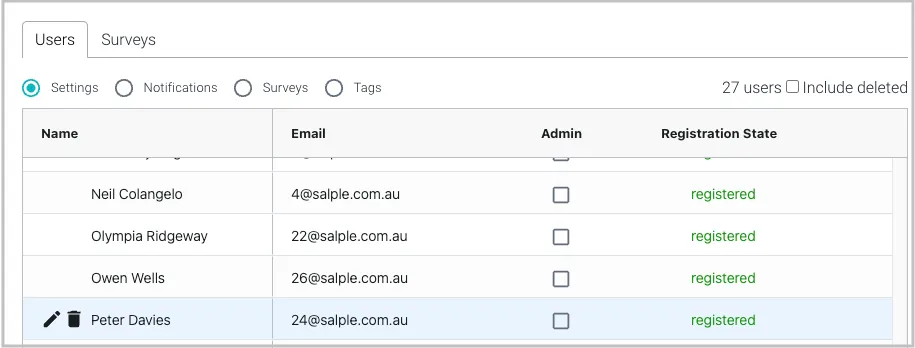
Hover your mouse over the employee, click the rubbish bin icon, then click Delete user in the popup.
Note: This user's posts (Salps) and survey results will not be effected. Their previously posted Salps and survey results will still be visible to the rest of the organisation.
Importing Users from a File
To add many employees at once to Salpluse, click on the Admin menu item, click on the Users tab, then click on the Settings radio button. This will show a list of users:
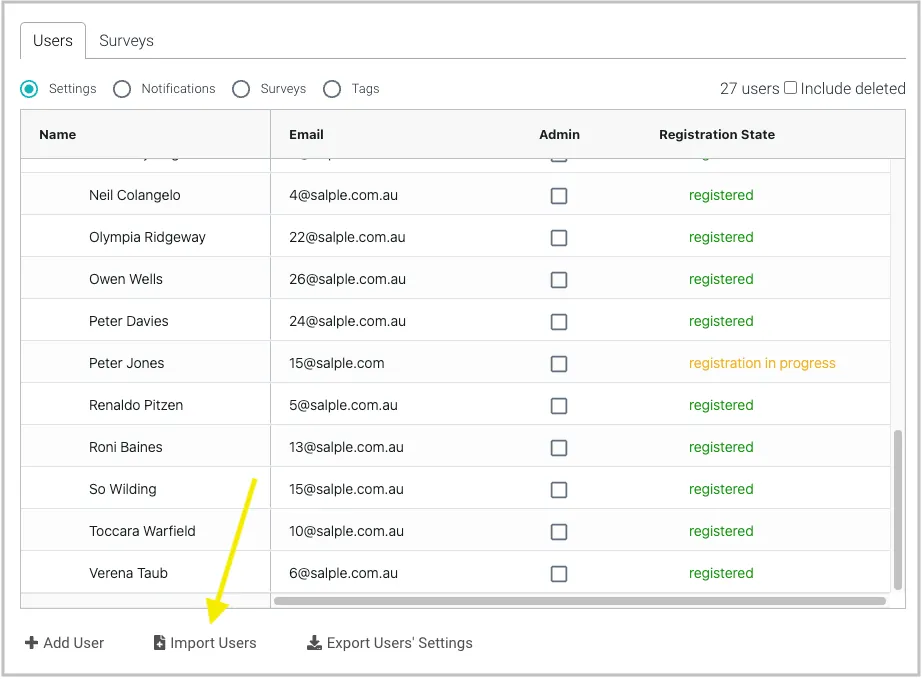
Click on the Import Users button, then chose a CSV file. The CSV file must have a header row with a minimum of 3 column headings as follows;
First Name Last Name Email Address
NOTE: For kiosk mode users, leave the email column blank.
After the first 3 columns, the remaining columns will be interpreted as containing tags for the user. The headings for these columns are ignored. If the user has any tags set, their existing set of tags will be removed first, then the new set of tags applied. If a tag does not yet exist for the organisation, it will be created and added to the organisation.
For example, if the following CSV file is imported:

Peter will have the tags VIC, Sales, and Manager set. David will have the tags NSW, Production, and Staff set. Justine will have the tags NSW, Production, and Staff set, and will also be configured as a kiosk mode user.
When Salpulse opens and reads the CSV file it will produce a dialog summarising the import process that will take place:
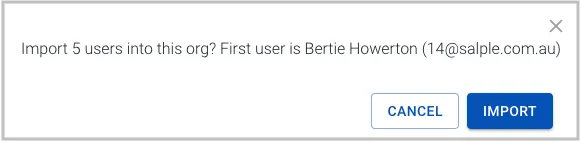
Click Import.
Following the import, you will then see a dialog asking if you want to send registration emails to any new (unregistered emails). If your organisation is using Salpulse just for culture surveys, then you would typically click No, do not send. Users do not need to register (ie: set up a login/password) in order to participate in the culture surveys. If however, your organisation is using the recognition platform features of Salpulse, click Yes, send registration emails.
Editing a User
To edit an employee in Salpluse, click on the Admin menu item, click on the Users tab, then click on the Settings radio button. This will show a list of users:
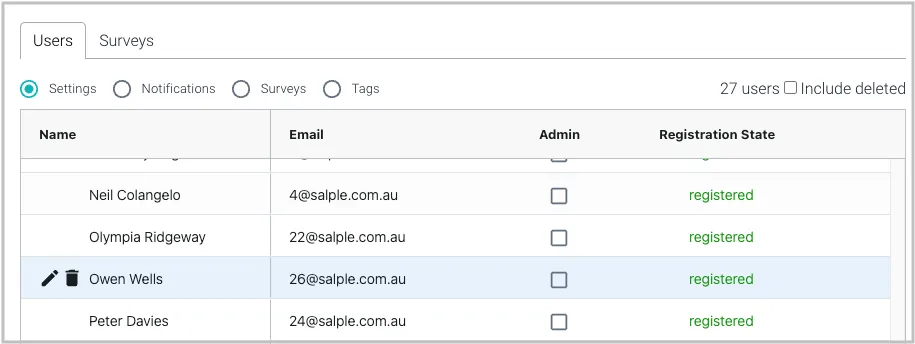
Hover your mouse over the employee, then click the pencil icon. In the dialog that opens, modify the fields as needed, then click Save.
Recover a Deleted User
When a user is deleted, their Salps and survey results are preserved. It is possible to recover a deleted user. Click on the Admin menu item, click on the Users tab, then click on the Settings radio button. This will show a list of users. Click on the Include deleted tick box:
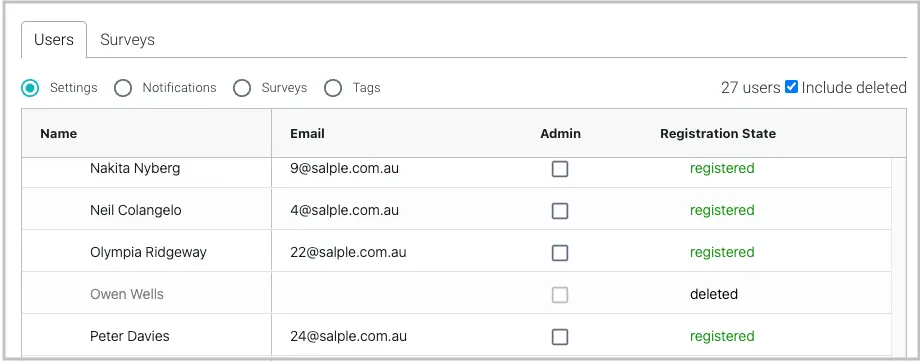
Deleted users will show up with their name greyed out and deleted in the Registration State column. Hover your mouse over the deleted employee, then click the recover icon:
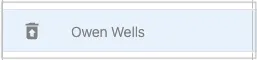
In the dialog that opens, enter the user's email address and click Yes, continue. This email address can be different to the email originally used for this user.
This action will leave the user in the unregistered state. If you wish to register them, hover over the unregistered label and click the plane icon:
